매번 앱을 출시할 때마다 거쳐야 하는 과정이라서 인터넷에 올라온 다른 분들의 내용 중에 저한테 필요한 것만 정리한 겁니다.
참고 1. https://webnautes.tistory.com/661
Android 앱에 광고 달기 ( AdMob )
안드로이드 앱에 AdMob 배너 광고를 다는 방법을 설명합니다. 마지막 업데이트 : 2019. 7. 4 1. https://www.google.co.kr/ads/admob/ 에 가입후 로그인합니다. 2. 왼쪽 메뉴에서 앱을 클릭하고 보이는 창에서 앱.
webnautes.tistory.com
일단 앱 출시를 위한 테스트는 마친 상태에서 애드몹 광고를 달아서 테스트하는 과정과 출시과정 입니다.
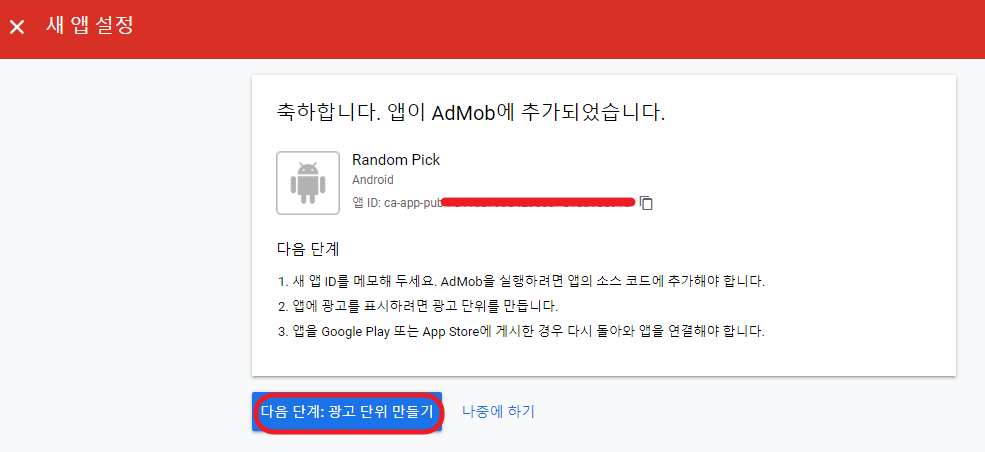
애드몹 - 앱ID와 광고ID 만들기


애드몹 광고를 위한 코드를 앱에 추가하기
테스트 광고 ID로 받아오기.
구글에서 제공하는 테스트 광고 ID를 받아온다. 출시전에 광고가 제대로 보이는지 확인하기 위한것으로 테스트 중에 애드몹 광고 부정클릭을 피하기 위해 필요하다.
애드몹 테스트 광고 아이디 : https://developers.google.com/admob/android/test-ads?hl=ko
테스트 광고 | Android | Google Developers
이 가이드에는 광고 통합에서 테스트 광고를 사용하는 방법이 나와 있습니다. 개발 중에는 테스트 광고를 사용하여 광고를 클릭해도 Google 광고주에게 비용이 청구되지 않게 하는 것이 중요합니
developers.google.com
String resource (strings.xml)에 앱ID, 광고ID, 테스트 광고ID 추가하기.
테스트 광고ID (banner_ad_unit_id_for_test)는 테스트를 위한 것입니다. 테스트 도중에 클릭되어도 부정클릭이 안된다.

AndroidManifest.xml에 인터넷 권한, 앱ID 코드 추가하기
- 인터넷 권한 코드
<!-- 인터넷을 사용 권한 -->
<uses-permission android ="android.permission.INTERNET"/>
- 앱ID 코드
<!-- play-services-ads 17.0.0 이상부터는 앱 ID를 입력 -->
<meta-data
android ="com.google.android.gms.ads.APPLICATION_ID"
android ="@string/admob_app_id"/>
AndroidManifest.xml
<?xml version="1.0" encoding="utf-8"?>
<manifest xmlns:android="http://schemas.android.com/apk/res/android"
    package="pe.thkim009.randomnumjava">

    <!-- 인터넷을 사용 권한 -->
    <uses-permission android:name="android.permission.INTERNET"/>

    <application
        android:allowBackup="true"
        android:icon="@mipmap/ic_launcher"
        android:label="@string/app_name"
        android:roundIcon="@mipmap/ic_launcher_round"
        android:supportsRtl="true"
        android:theme="@style/AppTheme">

        <!-- play-services-ads 17.0.0 이상부터는 앱 ID를 입력 -->
        <meta-data
            android:name="com.google.android.gms.ads.APPLICATION_ID"
            android:value="@string/admob_app_id"/>

        <activity
            android:name=".NumberActivity"
            android:screenOrientation="portrait">
            <intent-filter>
                <action android:name="android.intent.action.MAIN" />

                <category android:name="android.intent.category.LAUNCHER" />
            </intent-filter>
        </activity>
        ...
    </application>

</manifest>
앱의 layout 파일에 애드몹 광고를 보여줄 View를 추가 합니다. 테스트를 위해서 아래처럼 테스트 광고ID (banner_ad_unit_id_for_test)를 넣어서 테스트 도중 광고를 클릭해도 부정클릭이 되지 않도록 한다.
<com.google.android.gms.ads.AdView
xmlns:ads="http://schemas.android.com/apk/res-auto"
android:id="@+id/adView"
android:layout_width="wrap_content"
android:layout_height="wrap_content"
android:layout_centerHorizontal="true"
android:layout_alignParentBottom="true"
ads:adSize="BANNER"
ads:adUnitId="@string/banner_ad_unit_id_for_test">
</com.google.android.gms.ads.AdView>
layout_number.xml
<?xml version="1.0" encoding="utf-8"?>
<LinearLayout
    xmlns:android="http://schemas.android.com/apk/res/android"
    xmlns:app="http://schemas.android.com/apk/res-auto"
    xmlns:tools="http://schemas.android.com/tools"
    android:layout_width="match_parent"
    android:layout_height="match_parent"
    android:orientation="vertical"
    tools:context=".NumberActivity">

    <include layout="@layout/toolbar"/>


    <LinearLayout
        android:id="@+id/layerContentNumber"
        android:layout_width="match_parent"
        android:layout_height="wrap_content"
        android:layout_weight="3"
        android:orientation="vertical">

        ...


    </LinearLayout>

    <LinearLayout
        android:id="@+id/layerButtonNumber"
        android:layout_width="match_parent"
        style="@style/LayerGenButton"
        android:orientation="vertical">

        <Button
            android:id="@+id/btnGenRandomNumber"
            style="@style/ButtonGenerate"
            android:layout_gravity="center" />
    </LinearLayout>

    <LinearLayout
        android:id="@+id/layerAdNumber"
        android:layout_width="match_parent"
        style="@style/LayerAd"
        android:orientation="horizontal"
        android:layout_gravity="center"
        android:gravity="center">

        <com.google.android.gms.ads.AdView
            xmlns:ads="http://schemas.android.com/apk/res-auto"
            android:id="@+id/adView"
            android:layout_width="wrap_content"
            android:layout_height="wrap_content"
            android:layout_centerHorizontal="true"
            android:layout_alignParentBottom="true"
            ads:adSize="BANNER"
            ads:adUnitId="@string/banner_ad_unit_id_for_test">

        </com.google.android.gms.ads.AdView>

    </LinearLayout>

</LinearLayout>
Activity java 코드에 광고를 위한 코드 추가하기
public class MainActivity extends AppCompatActivity {
private AdView mAdView;
@Override
protected void onCreate(Bundle savedInstanceState) {
super.onCreate(savedInstanceState);
setContentView(R.layout.layout_number);
//Admob
MobileAds.initialize(this, new OnInitializationCompleteListener () {
@Override
public void onInitializationComplete(InitializationStatus initializationStatus) {
}
});
mAdView = findViewById(R.id.adView);
AdRequest adRequest = new AdRequest.Builder().build();
mAdView.loadAd(adRequest);
....
}
}
애드몹 광고 ID로 변경하기
테스트가 끝나고 앱이 구글 플레이 스토어에 등록되기 전에 layout 파일에 적용한 테스트 광고ID를 발급받은 실제 광고ID로 바꾸어 앱 출시를 준비한다.
<com.google.android.gms.ads.AdView
xmlns:ads="http://schemas.android.com/apk/res-auto"
android:id="@+id/adView"
android:layout_width="wrap_content"
android:layout_height="wrap_content"
android:layout_centerHorizontal="true"
android:layout_alignParentBottom="true"
ads:adSize="BANNER"
ads:adUnitId="@string/banner_ad_unit_id">
</com.google.android.gms.ads.AdView>
'SW 개발 > Android Java' 카테고리의 다른 글
| 안드로이드 앱 프로젝트 구조 (0) | 2020.09.18 |
|---|

댓글